11 Yoga Poses for Beginners to Know
By Alissa Rodgers
Walking into a yoga studio for the first time can feel intimidating. I can remember the dread I felt before arriving at my first class – feeling anxious about not knowing what to do and wondering what people might think when they saw my unathletic and inflexible self trying to get into these weird “poses” I had no clue about.
While hopefully your first yoga experience is nothing like the picture I created in my head, it can help ease some of the apprehension before your first class if you have an idea of what some of the commonly taught yoga poses are. Your yoga instructor is being paid to teach you the poses he or she offers in class, so do not for a second worry about having some sort of pre-requisite knowledge. It’s very rewarding as a teacher to have the opportunity to help people get started on their yoga journey. If you do want to come in with a bit of a foundation, though, here’s a quick overview of yoga poses it can be helpful for beginners to learn early on:
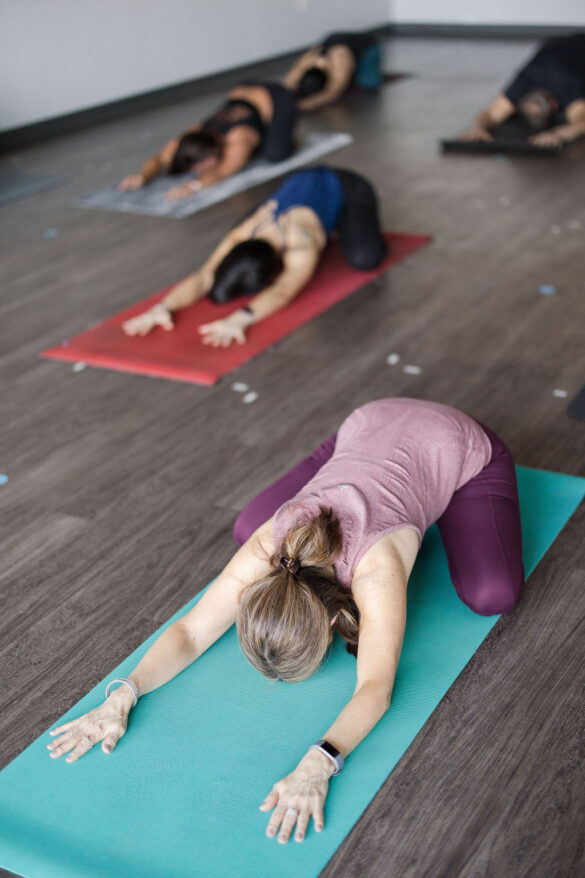
Child’s Pose – many classes start with this pose, which looks pretty relaxing but doesn’t always feel so in your body. To get there, you’ll start seated on your heels, separating your knees to a comfortable distance and then folding over your legs until your hands, elbows and maybe your head can relax down to the ground. To make this more comfortable, try placing a rolled up blanket between your hamstrings and calves and/or a block under your head.
Cat / Cow – this is actually 2 different poses, but they are often linked together to provide a gentle warm up for the spine. You start from a tabletop (on your hands and knees) position. The inhale breath is usually linked to cow pose, which is an arching of the spine as you dip your belly down and lift your chest up. The exhale breath is usually linked to cat pose, which is a rounding of the spine as you tuck your chin into your chest and lift your mid-back toward the ceiling. If you have knee sensitivity, you can place a folded up blanket under the knees.
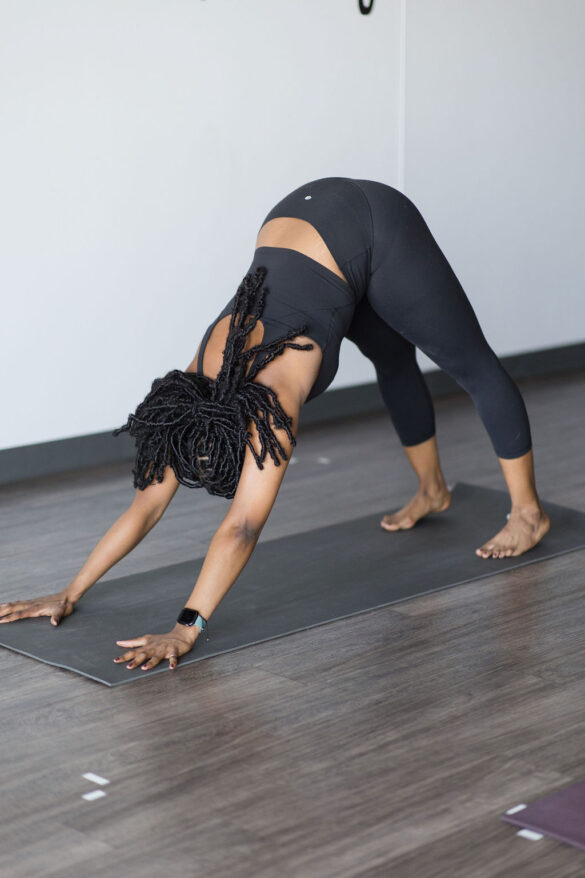
Downward Facing Dog – one of the most notorious yoga poses, we tend to do this one a lot in dynamic classes. It’s a big shape and can be challenging at first, so don’t mistake its popularity for being easy and accessible. Essentially you are making an upside down “V” shape with your body. Your hands are about shoulder width apart, flat and pressing down firmly, especially through your index finger and thumb. From there, you lengthen your spine through lifting your tailbone up and you stretch the backs of the legs through lowering the heels down. Due to tight hamstrings and/or calves, many people can’t press their heels into the ground – no worries, keep them lifted as needed. In addition, for many people a slight bend (or maybe even a lot of bend) in the knees is very helpful in this pose.
Plank Pose – also known as the top of a good old fashioned push-up. One of the things we focus on in many yoga classes is maintaining abdominal engagement to help hold us up, so be aware of your hips dipping down in this pose. If they do, consider dropping your knees to the ground while you focus on learning to engage the muscles of your core (pull up on your bathroom muscles and draw your belly button in at the same time and you’ll start firing up those core muscles). From plank, we often lower halfway (a.k.a. low plank or chaturanga) or all the way to the ground. In yoga, we do this as more of a tricep-style push-up, so as you lower, attempt to keep your elbows close in to your rib cage (vs. having chicken wing arms). Again, doing this with knees dropped is always a great option!
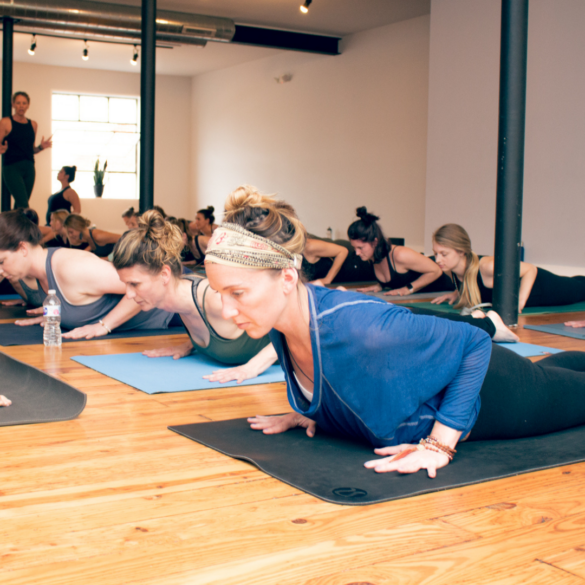
Cobra Pose – this is a wonderful backbend to help strengthen the upper back muscles. Once you get all the way to the ground on your stomach, you’ll simply lift your chin and chest away from the ground. Keep your lower body connected and strong, including pressing the shoe lace side of your feet into the mat. Once you lift your chest, try rolling your shoulders down and back to get a nice stretch across your chest.
Chair Pose – Another popular (although not always so fun) pose. This one is fantastic for strengthening the legs. A common misperception is you have to sit really low in your chair pose for it to be “working.” That can often cause aggravation in the lower back. Instead try not sitting back and down so far (maybe more like a bar stool?!) and add in a core focus by imagining you are pulling your lowest ribs down and in to connect them to your abdominal muscles. This is great core toning to help protect your lower back. Arms are traditionally extended alongside the ears, although know that if the shoulders tire here, you can always press your hands together in front of your chest or grab a hold of your hips with your hands.

Crescent Lunge (also called High Lunge) – most people are familiar with lunges so I’ll simply offer a few helpful hints here. First, know that in Crescent Lunge, your back leg heel is raised from the ground (an important distinction from the next pose, Warrior 1). If this is too much, you can always drop your back knee to the ground. If you are feeling off balance in your lunge, try widening your stance so you aren’t lining your feet up like you are on a tight rope. If you want a little more fire in your lunge, scoot your back toes back a bit.
Warrior 1 – the only difference between Warrior 1 and Crescent Lunge is your back foot is completely on the ground. For most people, they need to angle the toes in about 45 degrees (toward the front corner of their mat) to allow for the hips to still primarily face the front of the room. When you can flatten your back foot and steer your hips forward, you’ll feel an amazing stretch in the back of the leg and build some strength in your thigh and hip muscles.

Warrior 2 – like Warrior 1, the back foot is completely on the ground, although this time for most people the toes are pointing out toward the side of the room (back edge of the foot is parallel-ish to the back edge of the mat, often being slightly pigeon-toed here works best). This allows for you to create the open hip position characteristic of Warrior 2. Your front knee is still aiming straight forward (be mindful of it wanting to cave in). Your arms move out to “T” with finger tips stretching in opposite directions. Your eyes traditionally are looking forward over your front fingers.

Pigeon Pose – if you’ve got tight hips and hamstrings, this one can be a doozy for starters, so know that there are many pigeon variations you can play around with. “Half pigeon”, as it’s often referred to, has you bending your front leg and extending your back leg. There is a misperception that your front shin bone has to be parallel with the top edge of your mat. This is impossible for 99% of people. I find for many a 45ish degree angle in your front knee vs. a 90 degree angle is a good starting point. If you do choose to fold over your front leg, be mindful of not flopping onto your bent leg hip – this will often take you out of the stretch you are trying to get from the pose. It’s helpful to place a block or blanket under that hip to help give it support. If that is absolutely not comfortable for you (and you aren’t the only one!), then I recommend taking a similar shape on your back. You might hear this referred to as “reclined pigeon” or “figure 4”. You’ll start with your knees bent and feet on the ground hip width apart. From there, cross one ankle over the opposite knee. You can stay right here if it’s enough sensation or to find more, you can gently press your inner knee forward with your hand or lift the other foot off the ground and lace up your fingers behind the thigh of that same leg, pulling the thigh toward your chest.

Savasana or Corpse Pose – over time, this often becomes a favorite pose. At first, though, it might be weird to lay on your back in stillness in a room full of strangers and do nothing for a few minutes. I often seen new students opening an eye to see if everyone else is still there or fidgeting through the stillness because it might be uncomfortable. I highly recommend you place just as much importance on this pose as any other. With life being so busy at times, this space of rest important for balancing your body, mind and energy and allowing the work you just did to sink in. It’s always my hope that over time students find the experience of deep calm and peace during these final moments of the precious time they’ve given themselves for self care.
There you have a quick snapshot of yoga poses for beginners to know. As I mentioned earlier, your teachers are getting paid to teach you, so I encourage you to take time before or after class to chat with them about any positions that aren’t feeling quite right and/or to ask questions that give you more information to help optimize your experience. And remember, this is called a “practice” for a reason – there is no end goal or final destination in any of these poses. Your body is always changing and your practice will therefore be different from day to day – your goal is to simply find what works best for you each time your show up on your yoga mat and to also be consistent in showing up…that’s how you unlock the incredible benefits of yoga!
Alissa Rodgers, eRYT500, is the founder and CEO of GoYoga. She fell into yoga after the birth of her first son. Feeling desperate to lose baby weight, reconnect to her body as well as find a sense of community, she tried yoga after the urging of her best friend. While she did not love it at first, she kept going back 2-3 times a week because she had started to feel different. Sure enough the extra weight began to fall off, but more importantly she began to feel more energetic, clear and confident than she’d ever felt before. It was the mental and energetic benefits that ended up having the most impact on her life. This eventually led to her desire to create more places in her community where people of all types and backgrounds could feel welcome and at ease beginning a yoga practice. Over time, this became one of the largest yoga chains in the Midwest, with now 8 studios located across Columbus, OH. She is passionate about delivering yoga in a way that is incredibly accessible and easy to follow along with, as she believes if it’s overly complicated, many people will miss out on the incredible benefits this practice has to offer for physical, mental and emotional health. View the Columbus, OH GoYoga schedule, including live stream class options here.
Recently Posted